This tote is literally the perfect bag I needed!! I recently went back to the office, working 3 days there and 2 days home. We are what is called "neighborhood seating" and so office desks need to be shared. This tote really does carry my whole life!!! Plus the fact that it's purple; it's a win, win!!!!💜
This is a beautiful color! Very easy to stretch and apply. I can get 2 manis from one pack.
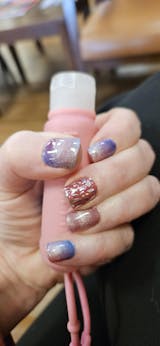
Metaverse is every bit as beautiful as it looks online, maybe more so! I did have a couple of pop offs, but that may be due to my application. The colors are gorgeous and Lit Lock gave it an amazing shine.
It was thick just as the reviews said it would be. I set it on a heating pad while I applied my nails. This helped it to spread on nice and easy. It’s a time saver to only have to apply this instead of a builder and separate topcoat.


